How To Start A Blog For Beginners in 2024 (Easy Step-By-Step Guide)
Welcome to the official guide on how to start a blog for beginners in 2024!
Congratulations on taking the exciting leap into the world of blogging!
If you’re eager to discover how to finally start a blog and turning it into a lucrative side hustle, you’ve come to the right place.
I started my first money-making blog after graduating college. I was working a part-time job and wanted to know if making money online was actually possible for me. Fast forward, I now generate hundreds of dollars from my blog.
The key to blogging success? I’m just like anyone else. I had no background knowledge in blogging, copywriting, or marketing.
The success to making money blogging comes down to
how willing you are to put in effort.
In this comprehensive guide, I’m here to help you kickstart your blog today, so you can start making money the right way.
Before we delve into the steps, CLICK HERE to discover the most cost-effective way to kick off your blog.
Now, let’s proceed with the next crucial steps in launching your blog today.
HOW TO START A BLOG – STEP-BY-STEP GUIDE
This guide simplifies the process, making it beginner-friendly and achievable from the comfort of your home. The reading time is a mere fifteen to twenty minutes, and executing the steps will take less than an hour.
What Is a Blog?
Before we jump into the how-tos, let’s clarify what a blog is.
A blog is a website that features articles centered around a specific topic or niche.
While some blog for personal enjoyment, monetizing is the goal for others. Before I started my blog, I already had the goal in mind that I wanted to make money with it.
It really depends on why you want to create a blog. But I think it’s safe to assume you’re reading this because you hope to make money blogging!
Let’s jump in!
How To Start A Blog For Beginners (in under an hour)
Step 1: Choose Your Blog Niche
What will your blog be about? If it’s a passion project, the niche is flexible. For money-making potential, focus on a niche you enjoy. Unsure? Start writing about your interests; the focus can evolve over time.
Researching and Selecting Your Niche When I started blogging, I aimed to align my interests with the blog’s focus.
Before delving into the technicalities, determining your blog’s niche is vital. Whether it’s a personal, niche, or business blog, attracting readers is key.
Fine-tuning your niche is crucial as it ensures reader engagement. General lifestyle blogs tend to struggle over time, so narrowing your focus is advisable.
Lifestyle blogs can include various niches like food, beauty, and parenting, but audience targeting is essential.
Popular blogging niches look like travel, home decor, personal finance, parenting, health, fitness, DIY and crafts, food, beauty, and fashion.
Step 2: Choose Your Blog Name & Domain Name
Your domain is your blog’s name (for example: upthesidehustle is the domain name of this blog). Choose a name that’s easy to spell, related to your niche, and has an available .com version.
After determining your niche, the next step in creating a blog is naming it. Naming a blog can be challenging, so adhere to some general rules:
- Keep names short and memorable.
- Create a long list of potential names to check for availability.
- Consider incorporating your name if you plan to be a personal brand.
- Use .com to make it easier for your visitors to remember your domain
- Don’t spend too much time with this!
Use domain.com to verify URL availability before purchasing. Additionally, envision the name’s long-term usage.
Step 3: Set Up Web Hosting
For blogging success, opt for self-hosting. Bluehost, my recommended web host, offers affordable plans, a free domain, and reliable service.
Get started HERE with plans as low as $2.95 per month.
For various blog types, including lifestyle or business blogs, opting for a self-hosted WordPress blog is recommended.
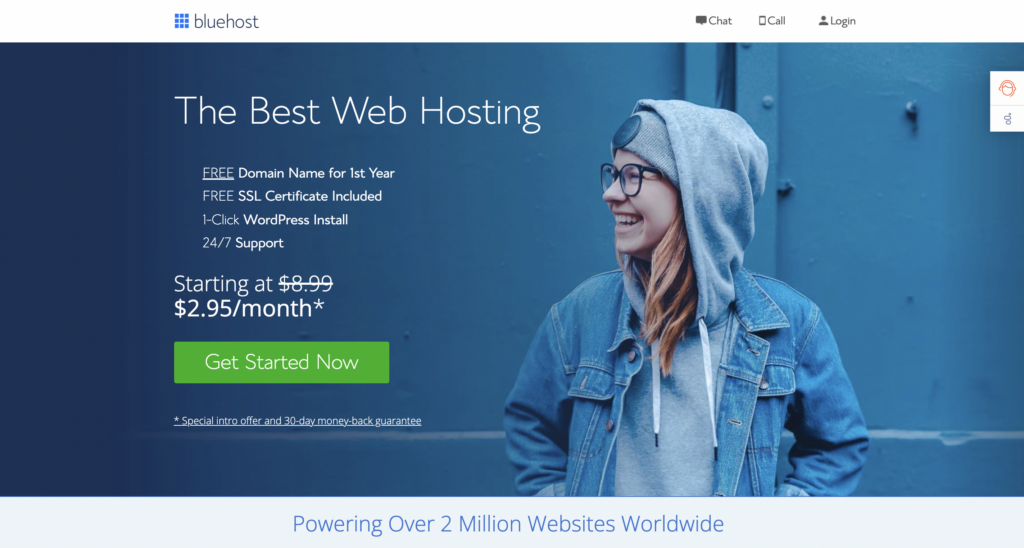
Bluehost is offering hosting packages starting at only $2.95 per month for my readers, and it includes a FREE domain name.
How to set up your blog
If you want to make money blogging, you will have to use a self-hosted blog. With a self-hosted blog, you can have your own blog domain (for example: .com or .net).
But a free hosted blog will not allow you that freedom to have your own domain.
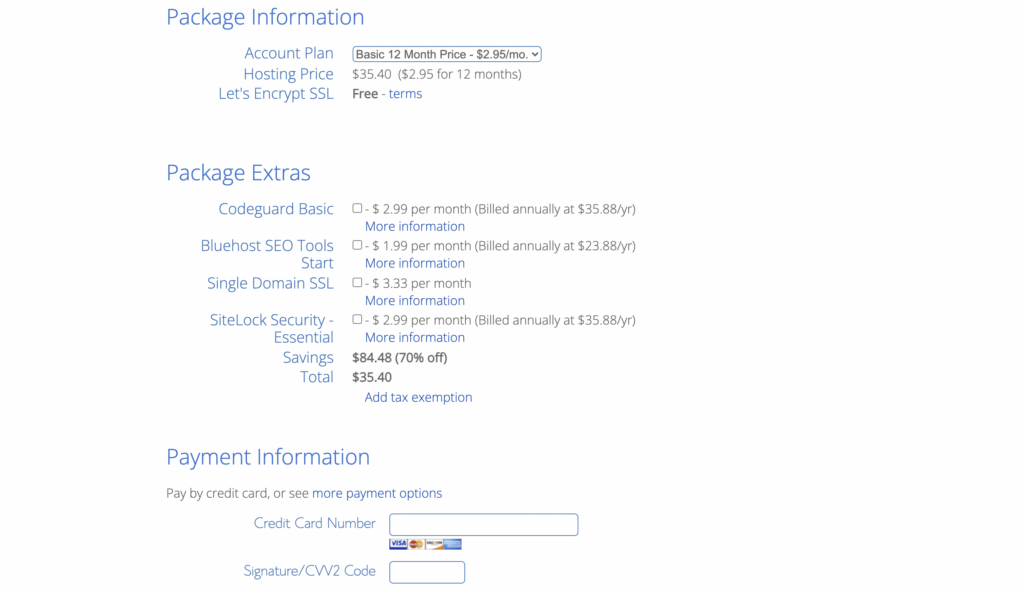
PS. A self-hosted blog will only cost you $2.95/month, which totals to only $35.40 a year!
The one that I have been using for years to host my blog is Bluehost.
Bluehost is one of the largest web hosting providers specialized in hosting WordPress.
Reasons to choose Bluehost for your WordPress blog include:
- WordPress optimized hosting configurations and auto-installers available.
- Free domain registration included.
- Unmetered bandwidth and generous storage space.
- Automatic WordPress updates and backups.
- 24/7 customer support.
- Very affordable pricing plans.
Steps to create your own blog
Signing up for Bluehost is easy and only takes a few minutes. Here is a step-by-step process:
- Go to Bluehost.com and click on the “Get Started Now” button. This will take you to the pricing and plan page.
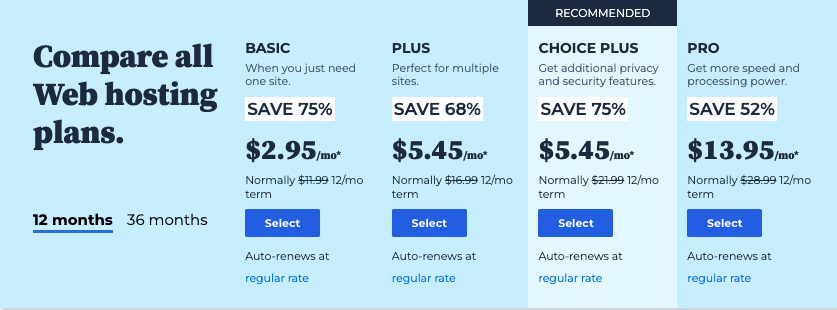
2. Select the plan you want. For a basic blog, the Basic shared hosting plan for $2.95/month is a good option.
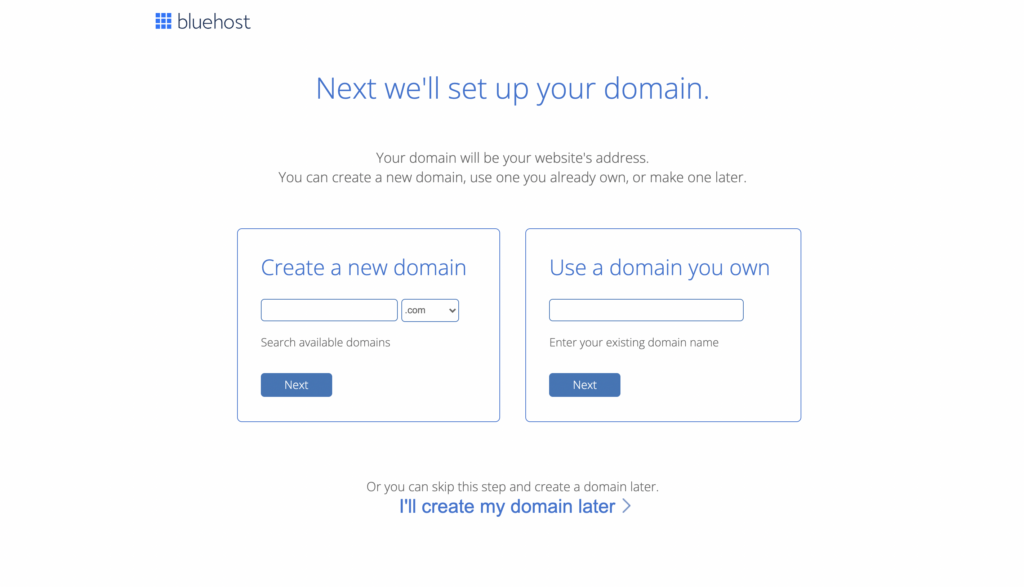
3. Enter your domain name or you can decide on your domain later.
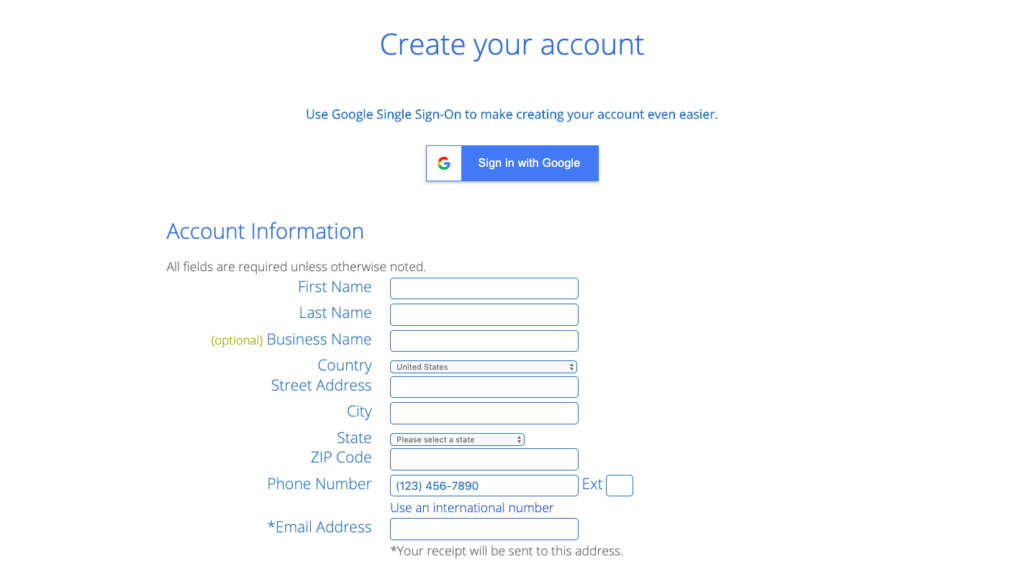
4. Enter your account information and click “Next”. This includes your domain name, email, password etc.
5. Select your package and enter payment information. I personally wouldn’t choose any package extras. You can always add later!
Yay! You crossed the finish line and just finished the first chapter of your blogging journey: getting a domain name and web host!
I’m so happy for you and am excited to see you start your blogging journey.
What to expect next:
- Verify your account via email. Bluehost will send you an email to the address you provided. Click on the link in the email to verify your account.
- Login to your Bluehost account. Use the login name and password you created during sign up.
- Congratulations, your Bluehost account is now active! You can now install WordPress and create your blog.
Within a few minutes you can have your Bluehost account created and ready to install WordPress! 🙂
Step 4: SELECT A BLOG THEME
When setting up your WordPress blog on Bluehost, you’ll need to choose a theme.
WordPress offers hundreds of free and premium themes to select from.
When selecting a theme, consider the following:
- Purpose – Pick a theme that aligns with your blog’s topic and brand. For example, a photography blog may opt for a visual theme that highlights images.
- Layout – Think about how you want your blog structured. Some themes have sidebars while others focus content in the middle.
- Features – Look for themes with features that will enhance your blog. This may include options like featured sliders, custom menus, widget areas, etc.
- Responsiveness – Choose a responsive theme that adapts to different devices like mobile phones and tablets. This improves the viewing experience for all visitors.
- Customization – Consider how customizable the theme is overall. Can you easily change colors, fonts, and other design elements?
- Simplicity – Avoid overly complex themes if you’re new to WordPress. Simpler designs are easier to manage and configure.
- Ratings and Reviews – Check what users are saying about the theme based on ratings and reviews.
- Pricing – WordPress has thousands of free themes but premium paid themes offer more features and design choices.
Customizing Your Blog
Once your blog is set up, you’ll want to customize it to fit your brand and style.
Here are some of the key things you can customize in your WordPress dashboard:
Appearance
Under Appearance > Customize, you can tweak various elements of your blog’s design. Some key options:
- Site Identity – Update site title, tagline, logo
- Colors – Change background color, link color, etc.
- Menus – Create custom menus to display pages/links
- Widgets – Add widgets like search bar, social icons, etc.
Pages
Pages allow you to create new pages separate from your blog posts. These are often used for your About, Contact, etc. To create a new page:
- Go to Pages > Add New
- Enter page title and content
- Hit Publish
You can then add these pages to your menus.
Plugins
Plugins extend WordPress’ functionality. Must-have plugins:
- Yoast SEO – Improve SEO of your site
- Google Analytics – Connect analytics
- Akismet – Block spam comments
Search the plugin directory to find other helpful plugins. Avoid installing too many.
Settings
Under Settings, you can configure:
- General – Site title, timezone, etc.
- Permalinks – Customize blog post URLs
- Discussion – Comment settings
- Media – File upload options
Take some time to explore all the customization options. This allows you to shape your blog to match your brand and needs.
5. promote your blog
Once you’ve set up your blog on Bluehost and customized it to your liking, it’s time to start promoting it to drive traffic.
There are several effective strategies for getting more visitors to your new blog:
Search Engine Optimization
One of the best ways to get consistent traffic to your blog over time is through search engine optimization (SEO).
This involves optimizing your content and site to rank higher in search engines like Google for relevant keyword phrases.
Here are some tips for improving your blog’s SEO include:
- Write long-form, in-depth blog posts targeting specific keyword phrases.
- Include your target keywords in key places like the title tags, meta descriptions, headlines, image alt text, and the post URL slug.
- Get other reputable sites to link back to your blog posts with your target keywords in the anchor text (aka guest post!)
- Leverage social media to get more shares and links.
Social Media Marketing
Promoting your blog content on social media platforms like Facebook, Twitter, LinkedIn, and Pinterest is a must.
Share your posts manually and encourage readers to share as well.
You can also run social media ads targeted to your ideal audience.
Networking and Guest Posting
Networking with other bloggers in your niche by commenting on their sites and participating in online communities helps drive referral traffic.
You can also reach out to conduct interviews or write guest posts to be featured on complementary blogs, which includes a link back to your site.
Guest posting expands your audience and showcases your expertise.
Email Marketing
Collect email newsletter subscribers on your blog and send them updates when you publish new content.
This helps build a loyal readership that returns. Promote your newsletter signup with popups or in your sidebar.
Offer an incentive like exclusive content to encourage signups. Send personalized, valuable emails so readers look forward to what you share.
Step 6: Make Money Blogging
Congratulations on your blog setup! Now, let’s talk revenue. Monetize from the start with these profitable methods:
- Affiliate Marketing: Promote products using affiliate links and earn commissions on purchases.
- Advertising: Work with ad networks like Monumetric, Mediavine, or Ezoic based on your blog’s traffic.
- Digital Products: Create and sell ebooks or online courses catering to your audience.
- Sponsored Posts: Collaborate with brands for sponsored content within your niche.
Your Blog Journey STARTS… NOW!
- Decide on your blog niche.
- Choose a domain name.
- Register your domain and get hosting with Bluehost at $2.95 a month.
- Pick a theme
- Pick a marketing strategy
- Choose an income strategy
Happy Blogging!
If you want to do some more reading about blogging, how to start a blog for beginners, and how to make money blogging, then be sure to read the following:


